
What is Apple Business Manager (ABM)?
ABM is a web-based portal that enables organizations to manage Apple devices efficiently from the point of purchase. Some of our customers opt to use ABM to help manage their Apple devices and benefit from zero-touch deployment and enrollment in Zip Security.
Pre-Requisites
Before follow the instructions below, it’s important to confirm two things:
- Please confirm you have an apple business manager account. If you don’t, you can set one up following the instructions here: https://support.apple.com/en-gb/guide/business/axm402206497/web
- Make sure you have access to your Jamf instance - email success@zipsec.com if you need this!
- Carry out these instructions from the Safari browser. Other browsers may cause issues.
Apple Device Purchasing Best Practices:
- ABM can experience a delay in registering the device after purchase. We recommend waiting ~48hrs between purchasing the device and powering it on to maximize the likelihood a device shows up in ABM records.
- Apple devices purchased in store are also known to have issues with ABM enrollment. We recommend buying from an online source if you would like a seamless ABM experience.
In both of these cases, these devices can still be easily enrolled using Zip’s enrollment instructions.
Instructions
Please follow the below instructions to set up ABM for your organization:
Where you see the text
{{subdomain}} you should replace this with your organizations’ jamf subdomain: e.g. for zipsecurity.jamfcloud.com , {{subdomain}}= zipsecurity. - Confirm the Apple Customer Number is Active
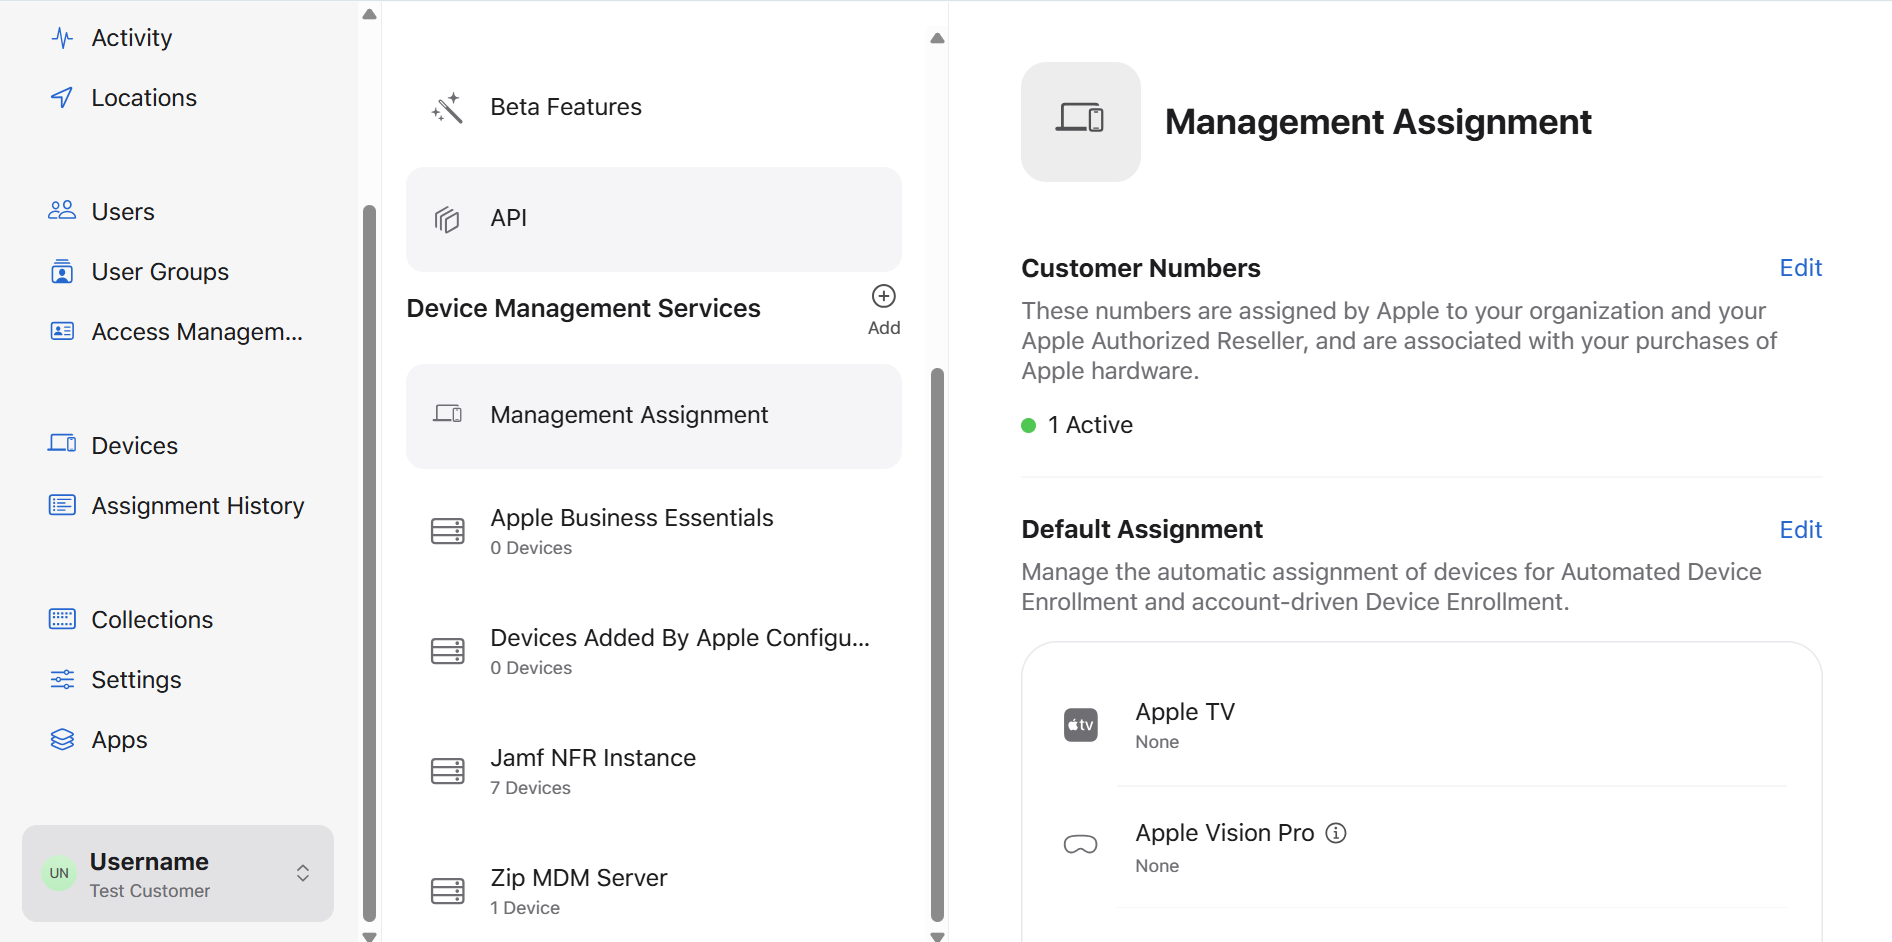
- Navigate to https://business.apple.com/#/main/preferences
- Alternately, click on your Account Name in the bottom left hand corner and select Preferences.
- Under the Device Management Services header, Select Management Assignment.
- Under the Customer Numbers header, confirm there’s an 🟢 Active indicator. If not, we can’t proceed! Reach out to success@zipsec.com to explore additional options.
- Get the public key from Jamf
- Navigate to
https://{{subdomain}}.jamfcloud.com/deviceEnrollmentProgramInstances.html - Press Public Key (This downloads a .pem)
- Configure ABM to recognize the Zip-managed Jamf instance
- Navigate back to ABM: https://business.apple.com/#/main/preferences
- Next to Device Management Services, Select Add +
- Service Name = “Zip MDM Server”
- Service Settings > Upload Certificate
- Upload the .pem we just downloaded from Jamf
- Press Save
- Press Download Token (up at the top of the page)
- Click through Download Server Token (this will download a .p7m)
- Upload the ABM token in Jamf
- Return to
https://{{subdomain}}.jamfcloud.com/deviceEnrollmentProgramInstances.html - Press + New
- Display Name = ABM
- Press Upload Server Token File
- Upload the .p7m token we just got from ABM
- Press Save
- Confirm that all of the Apple ID fields have values
- Return to
https://{{subdomain}}.jamfcloud.com/deviceEnrollmentProgramInstances.htmland confirm that Last Sync exists
- Select the MDM Server we just created in ABM as the Default MDM service
- Return to ABM: https://business.apple.com/#/main/preferences
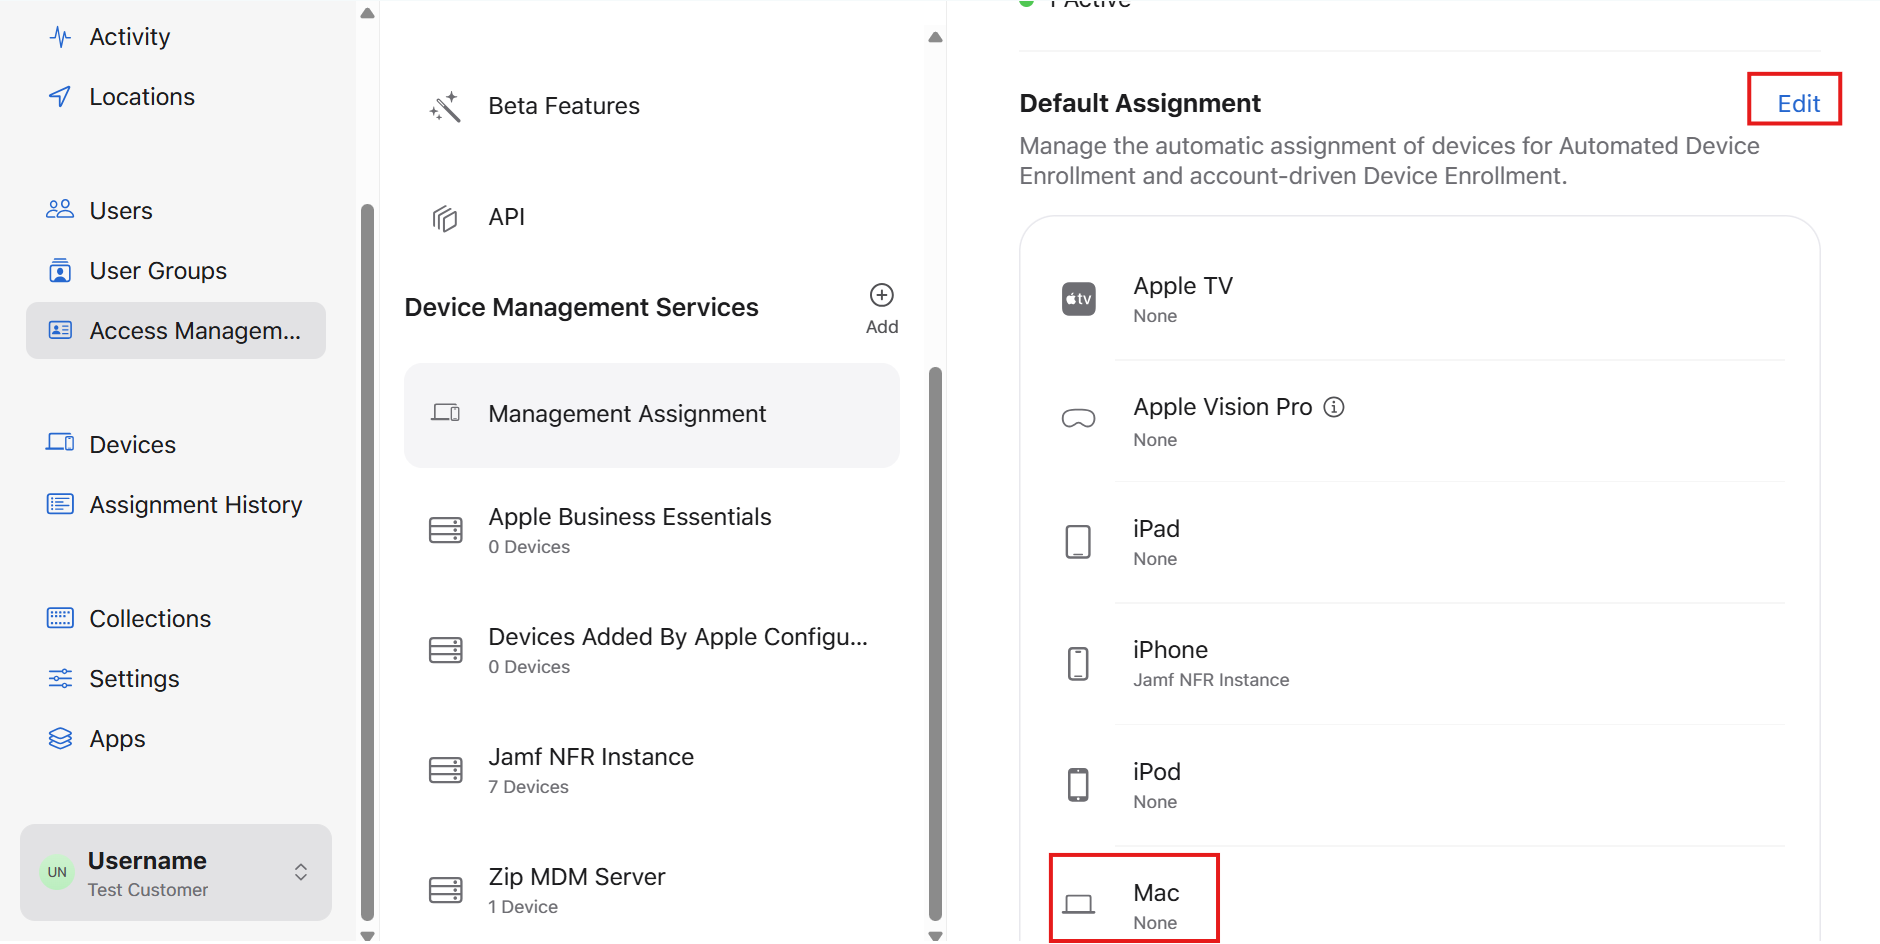
- Management Assignment > Device Assignment > Edit
- For Mac, select “Zip MDM Server” (what we defined above)
- Press Done
- Configure IdP based SSO during Pre Stage Enrollment
- Navigate to
https://{{subdomain}}.jamfcloud.com/view/settings/global-management/enrollment-customization - Press + New
- Display Name = “SSO Sign in Pane”
- Description = “SSO Sign in Pane for Google Workspace”
- Under PreStage Panes, Press + Add Pane
- Display Name = “SSO Sign in”
- Pane Type = “Single Sign-On Authentication”
- Configure Enrollment Access For = “Any identity provider user”
- Enable Jamf Pro to pass user information to Jamf Connect = “Disabled” / Off
- Press Apply
- Define what the MDM server will do
- Return to
https://{{subdomain}}.jamfcloud.com/computerEnrollmentPrestage.html - Press + New
- Within General
- Display Name = “Zip MDM Server”
- Automated Device Enrollment Instance = ABM
- Check Automatically assign new devices
- Check Make MDM Profile Mandatory
- Check Prevent user from enabling Activation Lock
- Enrollment Customization Configuration, select SSO Sign In Pane
- Within Setup Assistant Options, check everything but…
- Location Services
- Terms and Conditions
- Touch ID / Face ID
- Choose your Look
- Accessibility
- You’re done!
Renewing ABM Certificate
After setting up your connection between Apple Business Manager and Jamf, you may need to renew the certificate. Please follow these instructions:
- Renew the token in Apple Business Manager
- Log in to your ABM account navigate to the Preferences page.
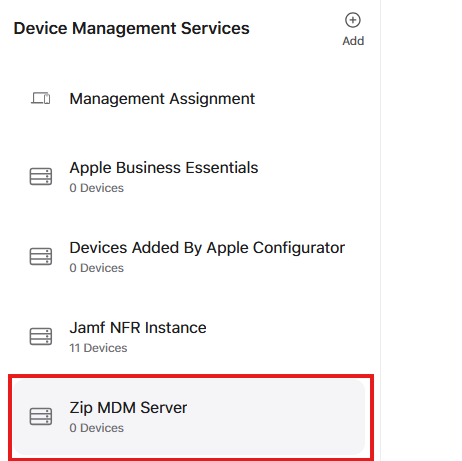
- Under “Device Management Services”, select “Zip MDM Server”.
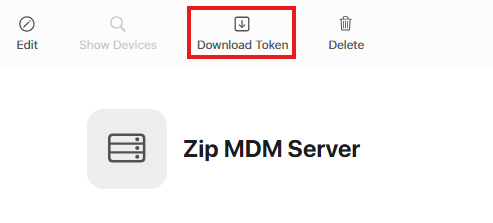
- At the top of the Screen, click “Download Token”.
- This message will pop up: “Downloading a new server token will reset your existing one.” Click Download Server Token to confirm.
- A .p7m file will be downloaded to your device.
- Upload the AMB token to Jamf Pro
- Navigate to
https://{{subdomain}}.jamfcloud.com/deviceEnrollmentProgramInstances.html - Click on the name of the existing token. It should be display name
ABM - Click Edit in the bottom right corner
- Press Upload Server Token File
- Upload the .p7m token we just got from ABM
- Press Save
- Confirm that all of the Apple ID fields have values
- Confirm that the expiration date has been refreshed to a future date.
- Please e-mail success@zipsec.com with this expiration date for our records.
Questions? Here’s how to reach us:
- Email: success@zipsec.com