We are so excited to be kicking off onboarding with you! The below document outlines the activities required to get you fully up and running with Zip!
Phase 1: Connect and Configure
Your experience with Zip Security will start when you receive your initial invitation to log into the Zip Console as a new administrator. If you don’t receive this in your email, please reach out to success@zipsec.com or your Account Executive.
After logging in, you’ll start connecting to external systems and configuring the console.
Connect your Existing Providers: Follow the instructions below to connect any existing providers you have in place today. Add providers directly from the Overview page by clicking on the blue
+ button for each provider category. Additional details available in these sections:Jamf: Even when a Zip representative has connected your new Jamf instance on your behalf, you will need to enable Single Sign On between Jamf and your Identity Provider for a seamless device enrollment experience.
On the Providers page, click on the Jamf provider, then the blue “Fix” button to make the connection.
Endpoint Threat Detection (Crowdstrike)
Enable Auto-Enforcement of Controls: After you connect providers, the Zip console will prompt you to allow automatic enforcement of controls related to each provider. We strongly recommend turning on enforcement for each control. Additional details on auto-enforcement and each security control are available in the linked sections.
[Recommended] Set up Compliance Frameworks: this allows for 1-click enablement of auto-enforced controls. If you don’t have a specific Compliance Framework you are working towards, we recommend SOC2 Framework as a great starting point!
[Optional] Configure Google → Entra ID account sync: if your organization uses Windows devices and Entra ID isn’t your primary Identity Provider, you will need to create duplicate accounts in your Microsoft environment to allow management by Intune. Configure this feature to allow Zip to automatically synchronize accounts from Google to Entra.
Set Up Notifications : Zip integrates with Slack and Email to bring notifications from the Zip Console directly to your day-to-day workflows. Setting this up ensures you’re notified when something requires your attention.
Phase 2: Device Enrollment
With your providers fully connected, it’s time to enroll devices in Zip Security’s services. From the same Overview page, click the blue
Start Enrolling button in the Device Enrollment section. You will be shown a list of devices that are ready to be enrolled, with the ability to send tailored device enrollment instructions to each user. This modal will walk you through the process, with additional details and recommendations listed below.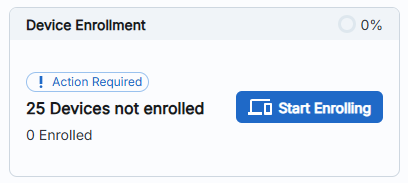
[Recommended] Test the Device Enrollment flow: while not required, we recommend first running a test enrollment on 1-2 devices to ensure there are no issues before sending out instructions to your entire fleet.
[Recommended] Turn on Automatic Enrollment and Reminder Emails: this modal will prompt you to turn on Automatic Enrollment emails and Enrollment Reminder emails. If you turn these features on, Zip will automatically send enrollment instructions when users log in with a new device and will send reminder emails to those who have not yet enrolled devices. You can adjust these settings later from the Configuration page of the Device Enrollment control.
[Recommended] Connect to Apple Business Manager: for organizations who use Apple Business Manager, follow these instructions to connect Zip to ABM and enable zero-touch deployment and enrollment in Zip Security. Because there are several settings that need adjustment, we recommend reaching out to success@zipsec.com when beginning this process.
[Intune Requirement] Purchase and Assign Microsoft Licenses: Every Windows PC user will require a Microsoft Enterprise Mobility and Security license. These licenses can be procured and assigned directly from Zip using these instructions.
[Optional] Review and Exclude Accounts or Devices: to ensure clear and accurate reporting, Zip offers the functionality to tidy up and exclude any accounts or devices you do not need to be in the scope of monitoring. This could include: employee’s personal devices, contractor devices, external/guest accounts, etc.
Phase 3: Monitor Enrollment and Control Enforcement
Track Device Enrollment Progress: Ensure your compliance levels reach 100% by following up with end users who haven’t enrolled their devices. If you’ve turned on automatic reminder emails, the system will send a series of emails, after which more personal outreach ( may prove more useful.
Review device enrollment status and follow up with any user who is marked as
In Progress or Not Started. If your users run into any issues, please use the below troubleshooting docs to help resolve the issues:
Review Security Control Compliance: the Zip Console will present you with your progress towards your security goals, both on the Overview page and the Controls page. Review any lagging controls and take the steps detailed in the specific Control detail page the ensure compliance.

Phase 4: Next Steps
When you’ve successfully onboarded your providers and have begun enrolling devices, you can review the additional features details in our documentation. A few idea on where to start:
Enable Chrome Browser Management for managing installation of Chrome’s secure browser and management of Chrome Extensions
The Zip Onboarding Team will monitoring your progress and be on hand to support with any questions or troubleshooting issues. You can reach out to success@zipsec.com and a member of our team will be happy to help!