
Context
Follow these steps to configure OAuth credentials that the Zip Console will use to manage your Intune computers.

Zip now supports connecting Intune using OAuth! If you previously connected Intune by creating an app registration, it’s easy to migrate to the new setup by going to the provider in Zip, clicking ‘edit’, and proceeding with the new Quick Connect option. If you’d prefer to follow the original steps, they are still included below for reference.
Note: if you’re connecting to a GCC High Tenant, please proceed with the legacy instructions below.
[New] Connect Intune from the Zip Console
Prerequisites
- An account with the
Global Administratorrole assignment in Azure AD
- Licenses for Intune
- Zip Security & Intune Licensing
We use separate credentials for AzureAD and Intune to allow for maximum flexibility and security.
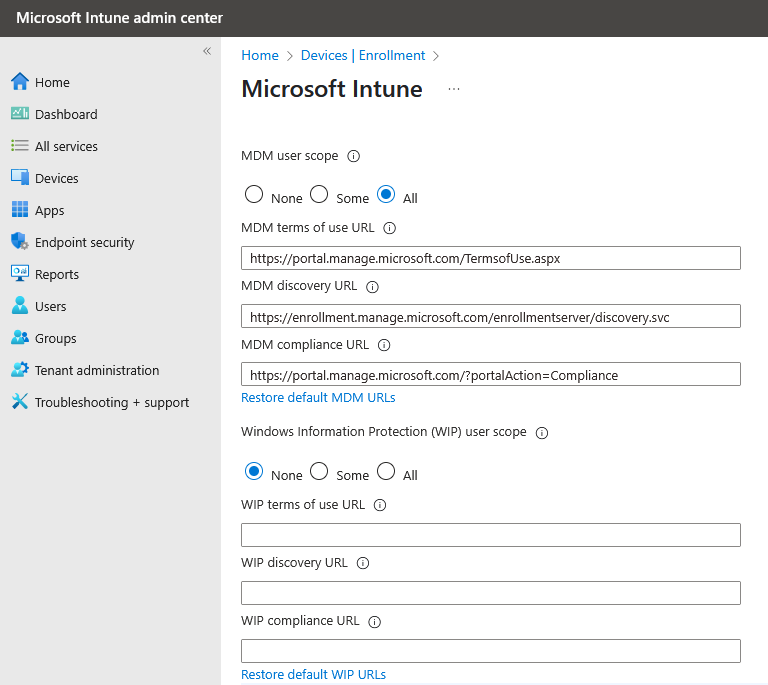
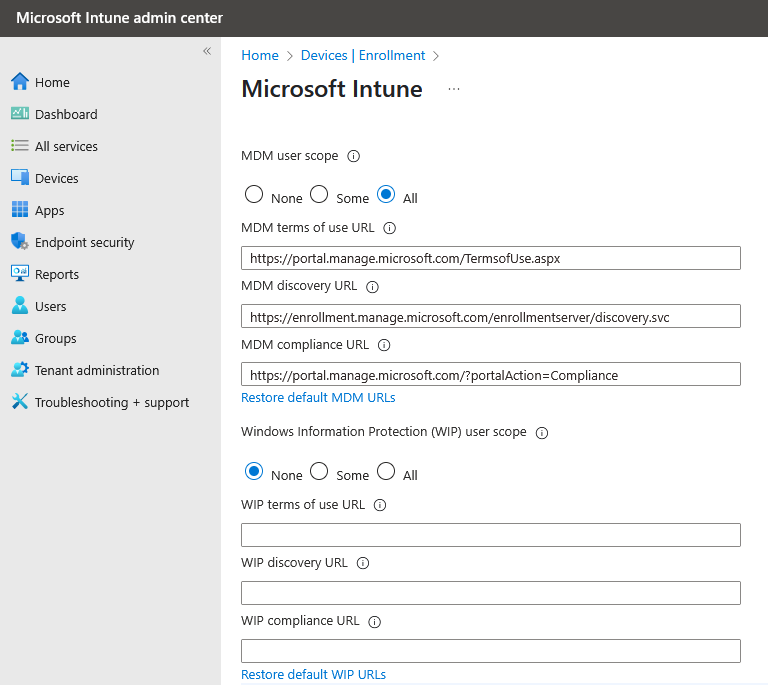
- [If using device enrollment with Zip] Lastly, you will want to make sure Windows Automatic enrollment is configured for Intune. You can do this by visiting endpoint.microsoft.com to reach the Intune Admin Center. You can then go to Devices > Windows > Windows Enrollment > Automatic Enrollment
- We recommend the settings below - WIP user scope is None and MDM user scope is either Some — if only a certain group is licensed for Intune — or All if you would like everyone to be eligible.
Connecting Intune from Zip
- Navigate to the Zip Console > Providers. Click Add > Intune > Quick connect.
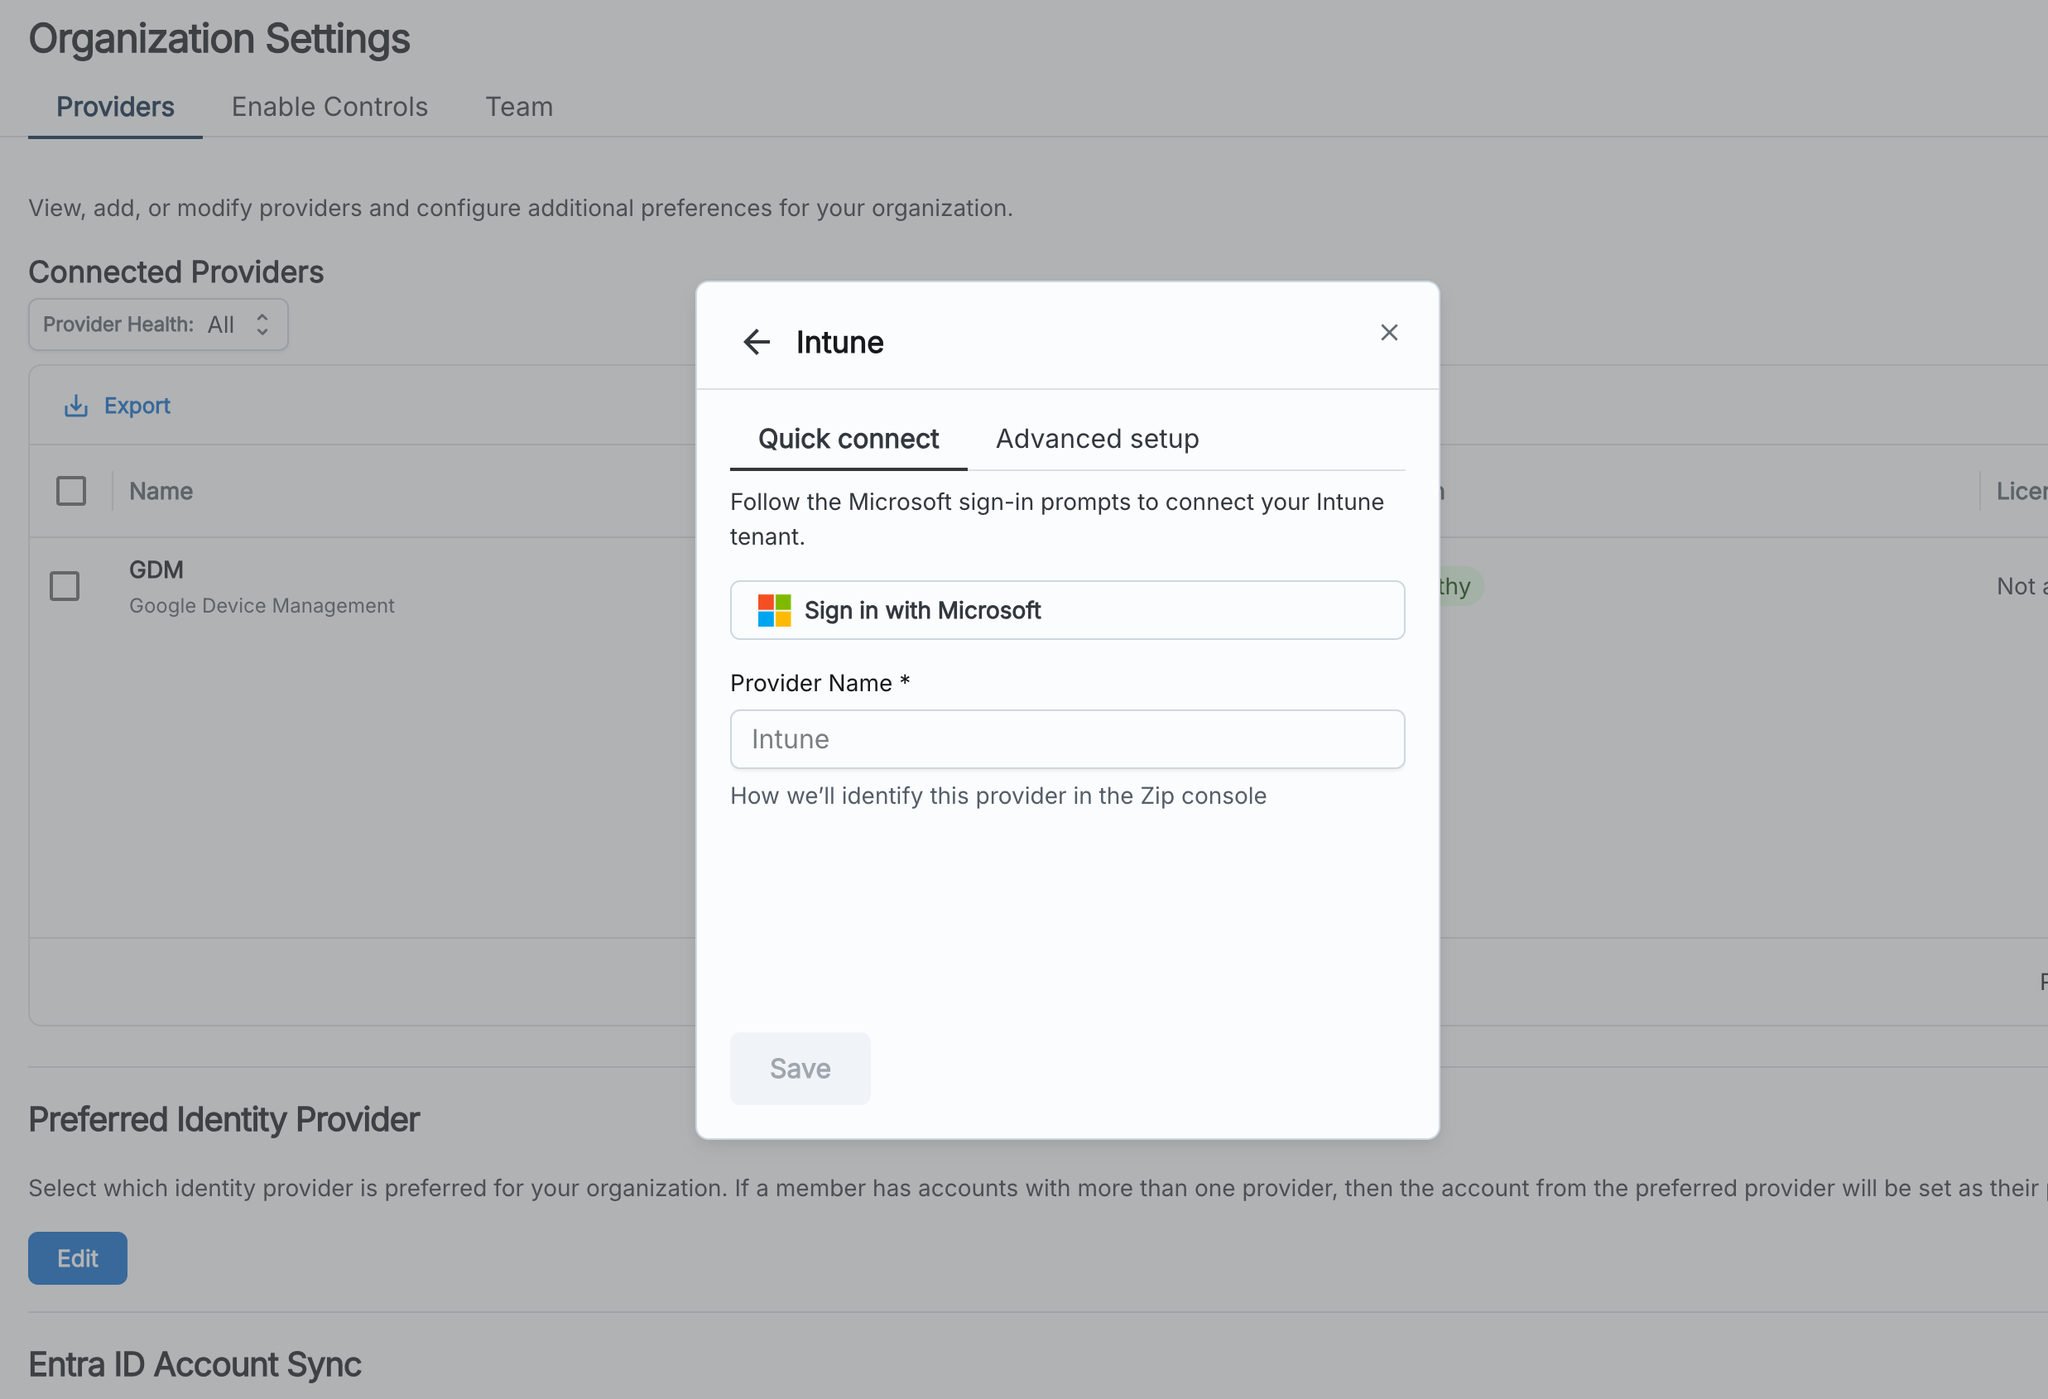
- Click “Sign in with Microsoft”. You’ll be redirected to log in with Microsoft and consent to all of the application permissions that Zip needs to manage Intune. Note that only admins will be able to consent.
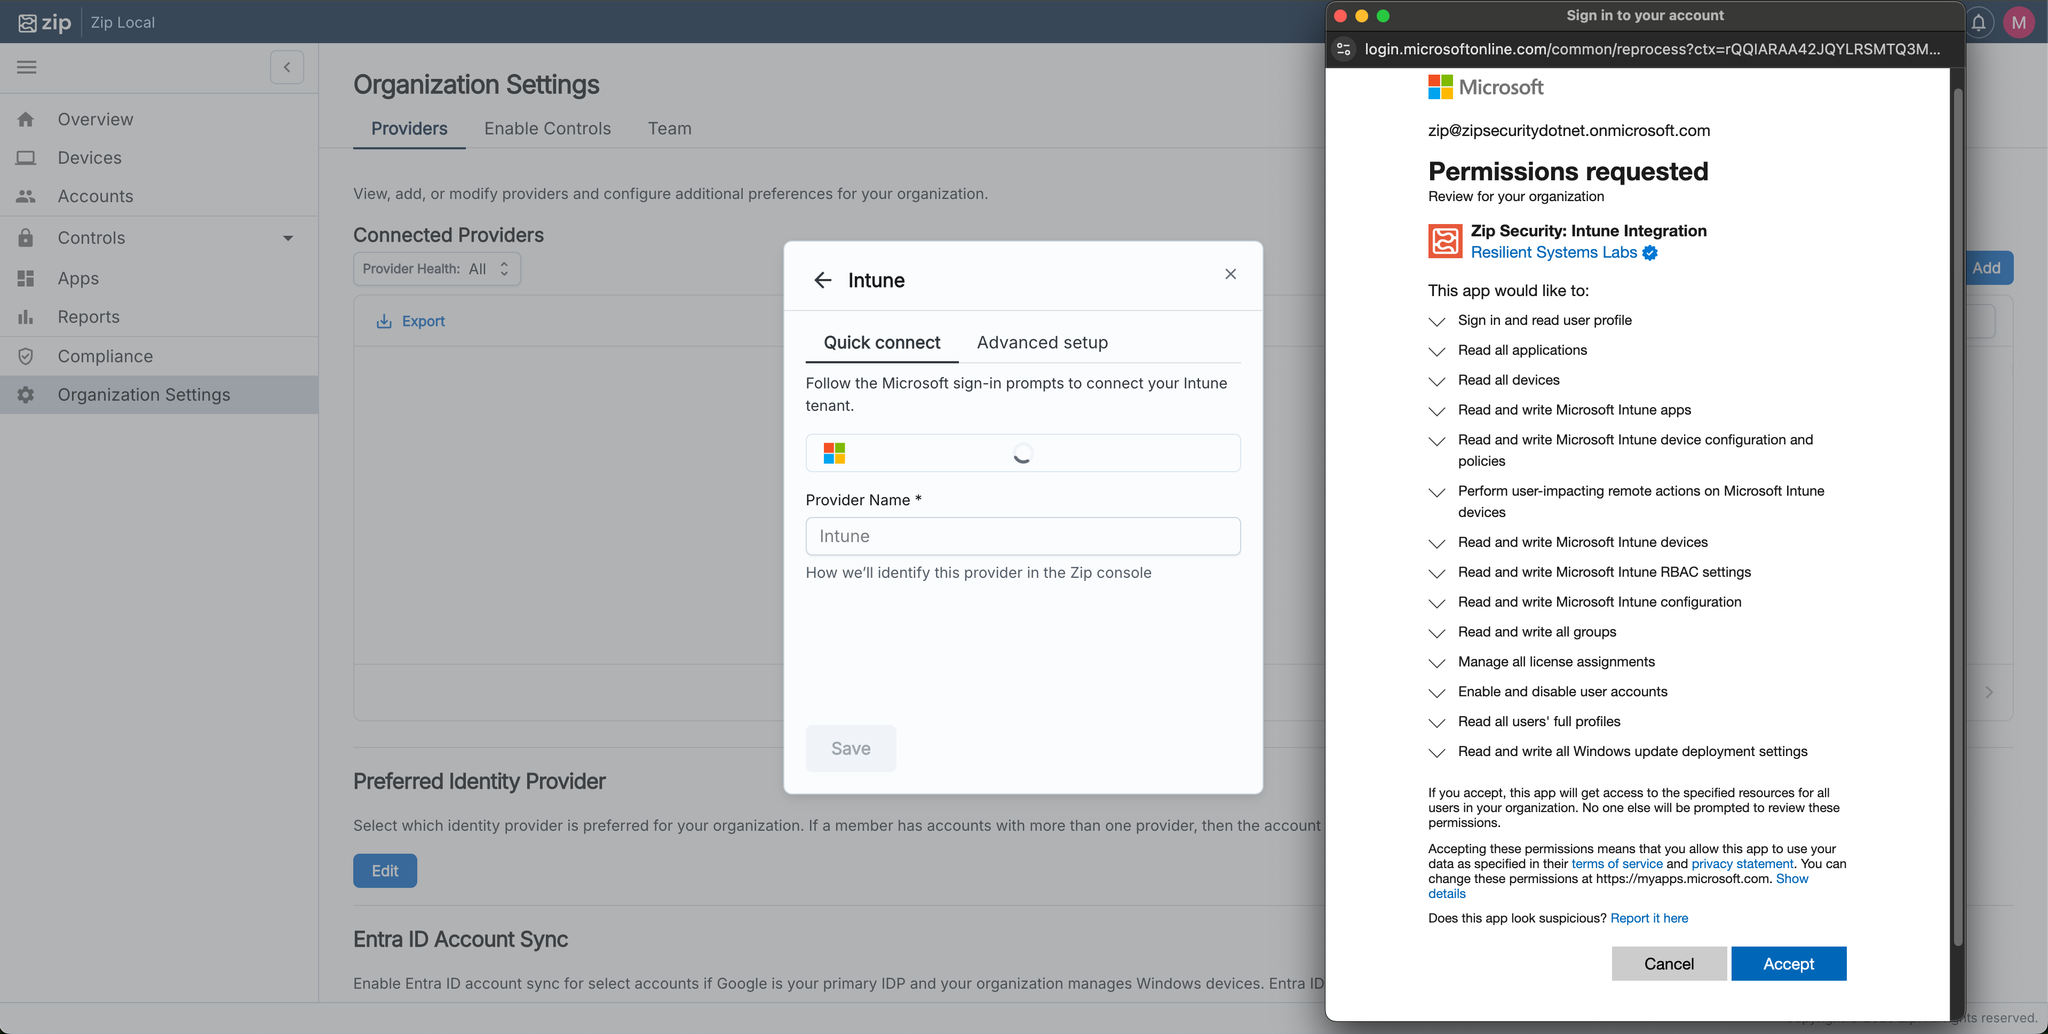
- After consenting, you’ll be redirected back to the Zip Console
- Fill in the provider name, then click ‘Save’ to finish.
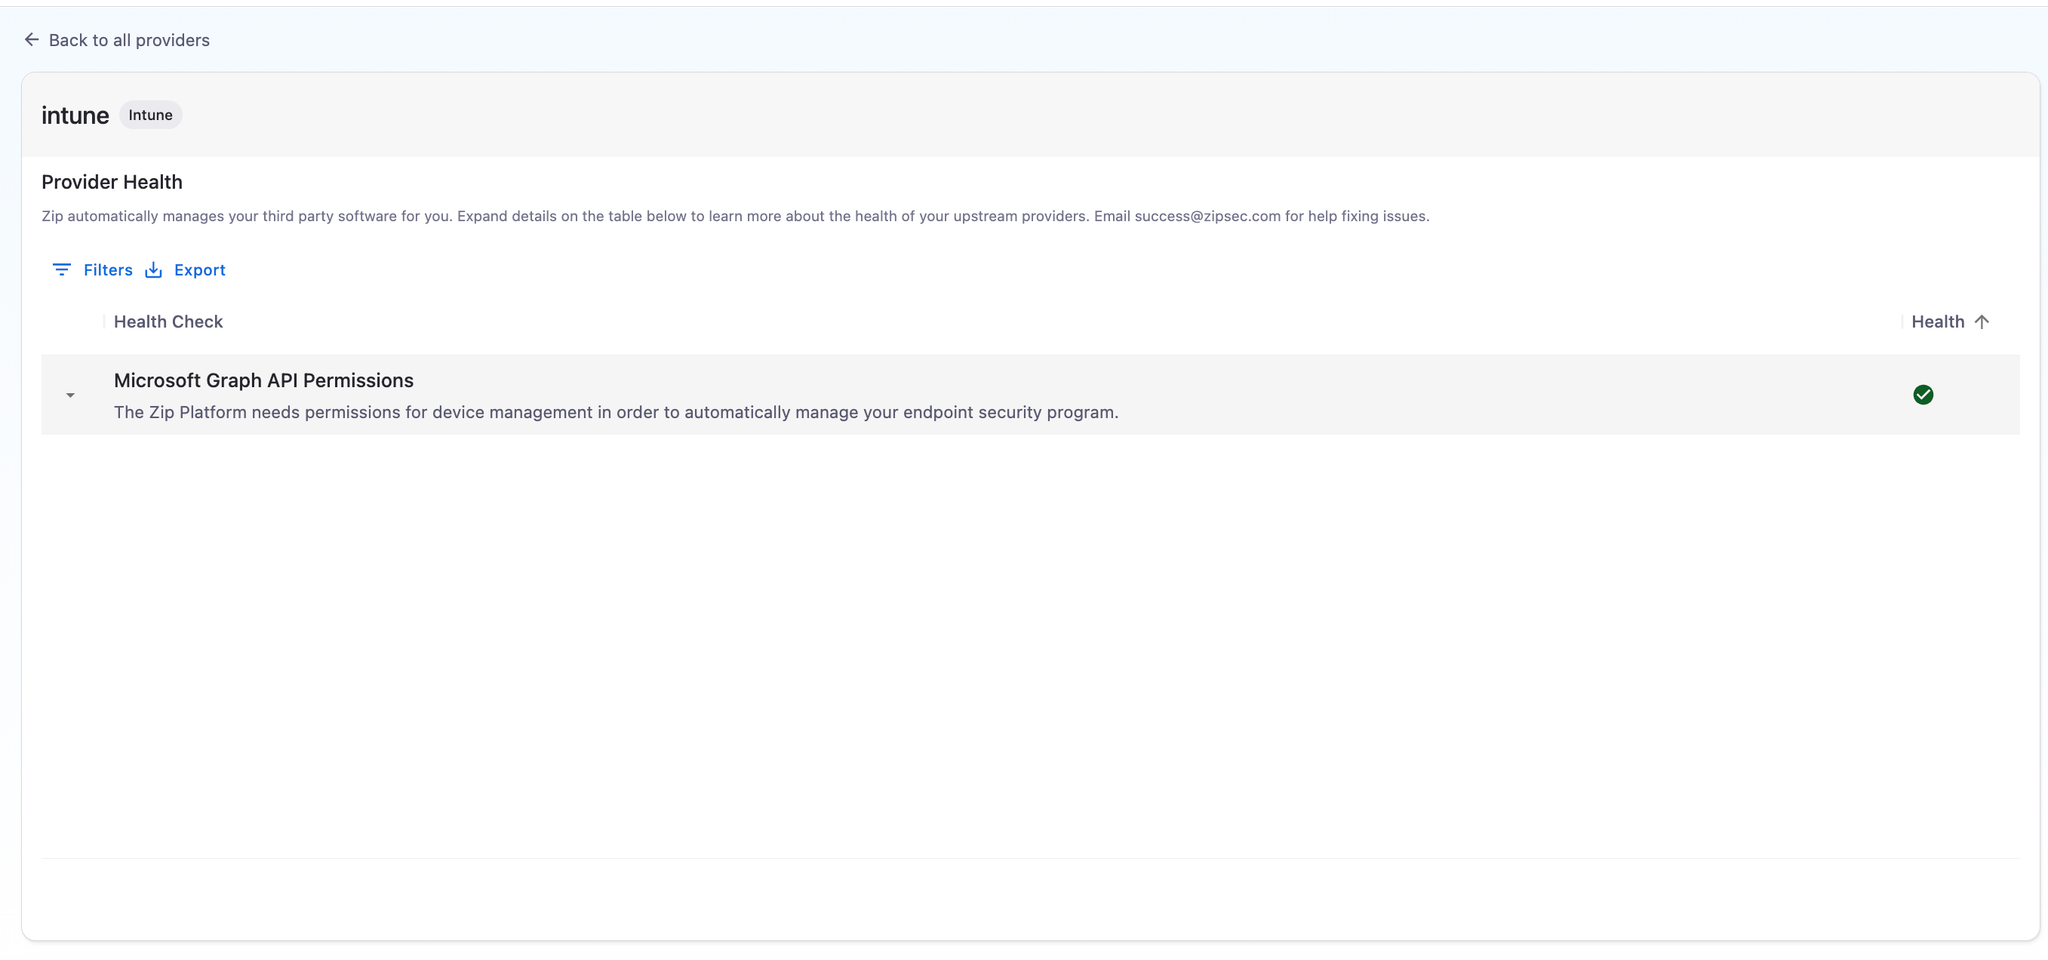
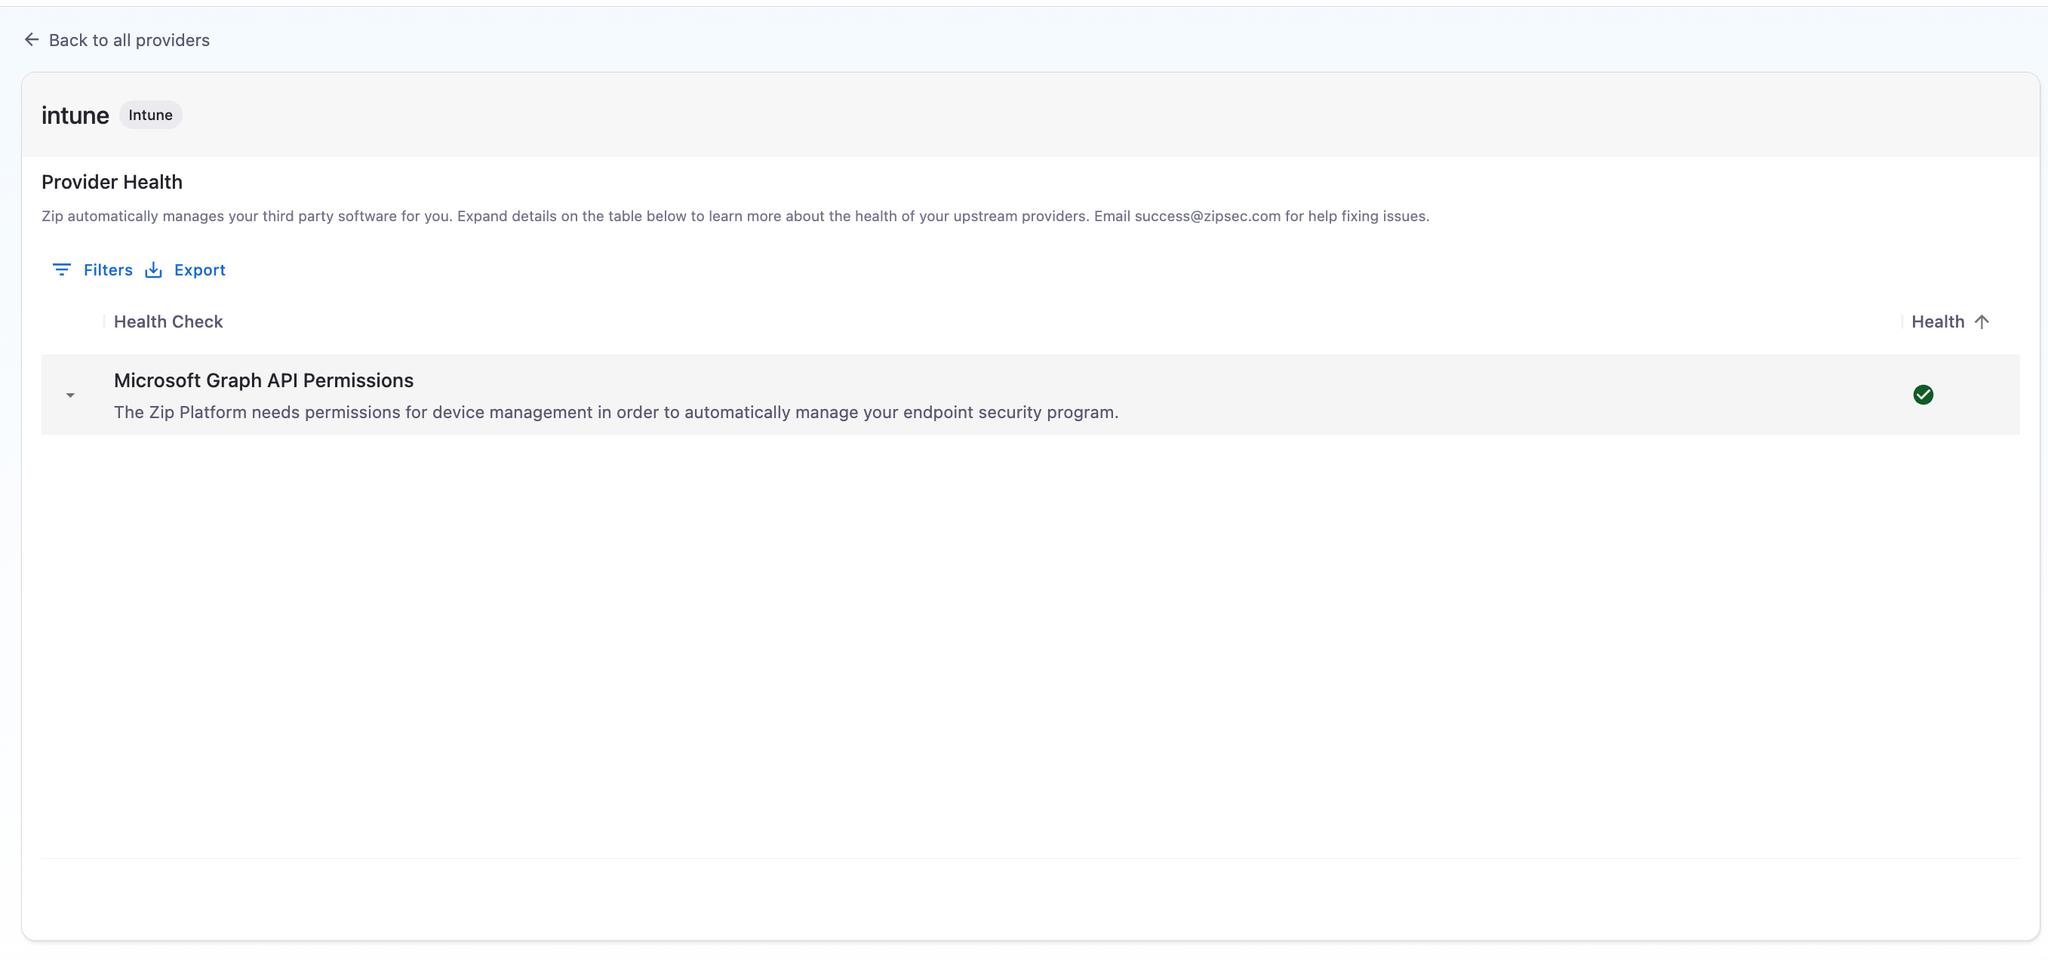
- To check that you’ve got all the right permissions, you can click into the new Provider you’ve created in the Providers Table (clicking on the name) to make sure all the health checks pass. If all goes well, you should see a green check mark under health like this:
Please contact success@zipsec.com if you experience issues.
[Legacy] Create an Application Registration for the Zip Console
Prerequisites
- An account with at least the
Application Administratorroles assignment in Azure AD
- Someone from the customer with the
Global Administratorrole assignment in Azure AD
- Licenses for Intune
- Zip Security & Intune Licensing
We use separate credentials for AzureAD and Intune to allow for maximum flexibility and security.
- [If using device enrollment with Zip] Lastly, you will want to make sure Windows Automatic enrollment is configured for Intune. You can do this by visiting endpoint.microsoft.com to reach the Intune Admin Center. You can then go to Devices > Windows > Windows Enrollment > Automatic Enrollment
- We recommend the settings below - WIP user scope is None and MDM user scope is either Some — if only a certain group is licensed for Intune — or All if you would like everyone to be eligible.
Create the Application Registration
- Navigate to the App registrations in Azure
- Select “New registration” from the page menu and fill out the form as follows:
- Name: “Zip Security: Intune”
- Supported account types: “Accounts in this organizational directory only (Zip Security only - Single tenant)”
- Redirect URI: leave blank
- Select “Register” at the bottom of the page
- From the following page, record the following values (they are not sensitive):
- Application (client) ID
- Directory (tenant) ID
- From the left hand menu, select “Certificates & secrets”
- Select “New client secret” and fill out the form as follows:
- Description: “Zip Security Service Account Secret”
- Expires: “730 days (24 months)”
- Select “Add”
- Be sure to record the Secret “Value” from the next page in a secure place, as it will never be displayed again. It is sensitive!
- From the left hand menu, select “API permissions”.
- Select “Add a permission”
- Search for and select “Microsoft Graph”
- Select “Application Permissions”
- Select “expand all”
- Select the following permissions
- Application.Read.All
- Device.Read.All
- DeviceManagementApps.ReadWrite.All
- DeviceManagementConfiguration.ReadWrite.All
- DeviceManagementManagedDevices.PrivilegedOperations.All
- DeviceManagementManagedDevices.ReadWrite.All
- DeviceManagementRBAC.ReadWrite.All
- DeviceManagementScripts.ReadWrite.All
- DeviceManagementServiceConfig.ReadWrite.All
- Group.ReadWrite.All
- LicenseAssignment.ReadWrite.All
- User.EnableDisableAccount.All
- User.Read.All
- WindowsUpdates.ReadWrite.All
- Select “Add permissions”
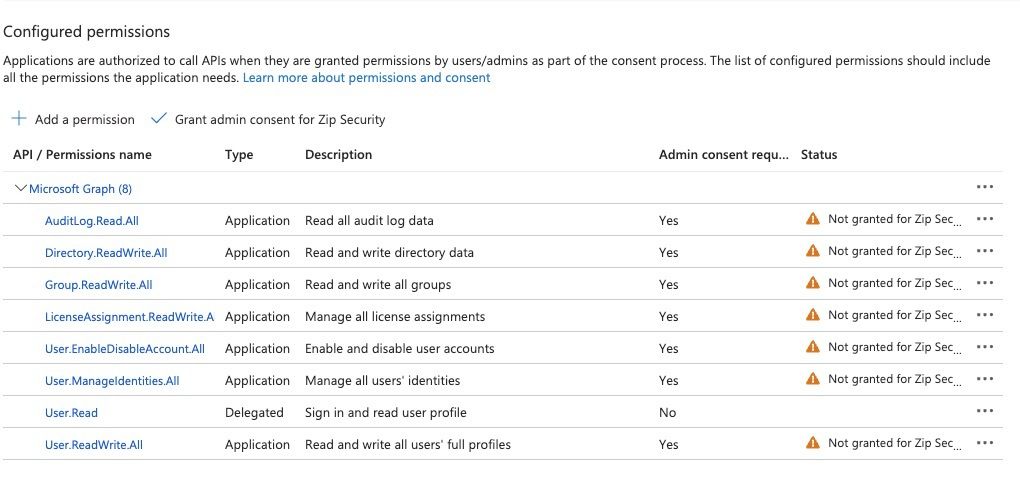
- Make sure you approve the permissions you’ve set by clicking ‘grant admin consent for Zip Security’:
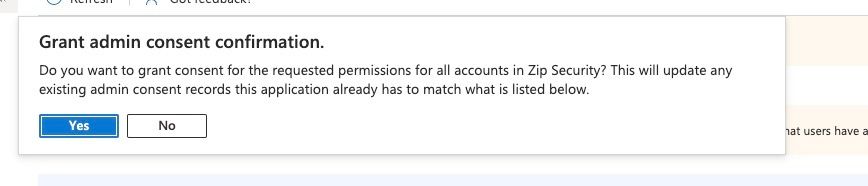
- And then confirming the permissions can be granted:
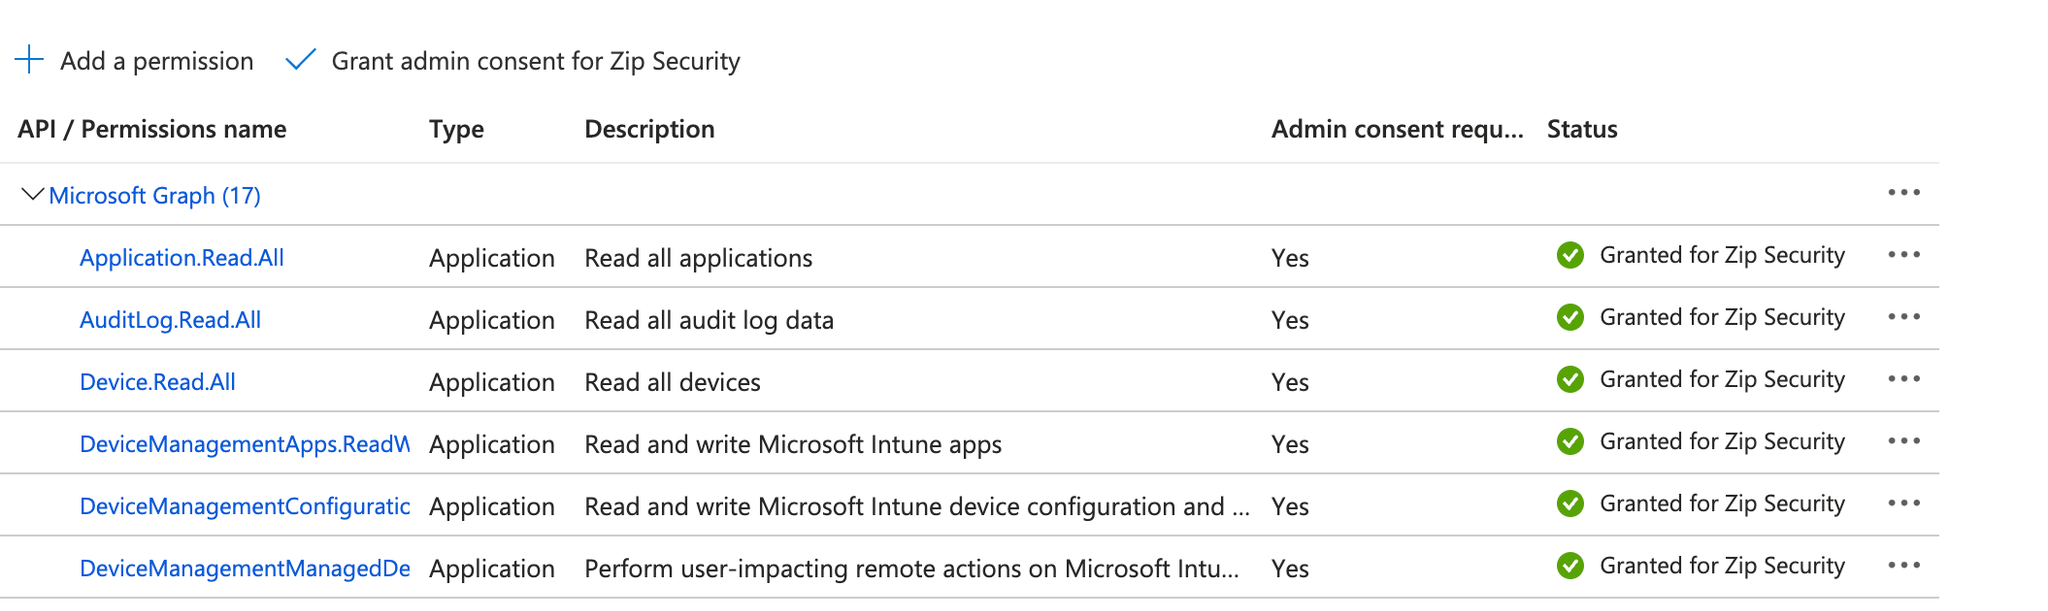
- You should see the green check mark that each permission has been granted for Zip Security, and you’re all set!
- Once you have added the permissions, navigate back to the Zip Console > Providers > Intune > Advanced Setup. Add a new Intune Provider with the ClientID (”Application (client) ID”), Client Secret (”Value”), and Tenant ID you jotted down in steps 3 and 4.
- Expand the “Advanced Configuration” toggle at the bottom of the form
- Change the Address field to
https://graph.microsoft.us - Change the Authority Host field to
https://login.microsoftonline.us
For organizations connecting to a GCC High Tenant
Otherwise, leave these fields as the default values.
Click Save to finish.
- To check that you’ve got all the right permissions, you can click into the new Provider you’ve created in the Providers Table (clicking on the name) to make sure all the health checks pass!
If all goes well, you should see a green check mark under health like here:
Please contact success@zipsec.com if you experience issues.
Zip Security & Intune Licensing