
Below we outline the guidance for connecting CrowdStrike to the Zip Console. If we are provisioning a CrowdStrike instance for you, this step will be completed by the Zip team. If your organization already has CrowdStrike provisioned, you can follow the below instructions to connect it with the Zip console.
Connecting Customer CrowdStrike Instance to the Zip Console
- Log in to CrowdStrike
- You should have been emailed a username and password from Crowdstrike directly.
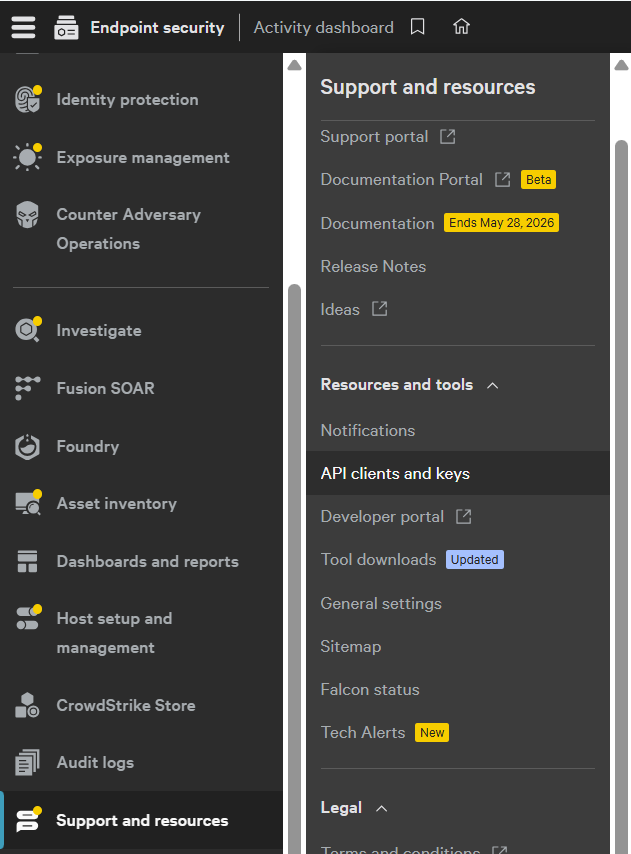
- In the menu, go to
Support & Resources→API Clients and Keysto create a service account.
- Click
Create API clientin the top right corner.
- In the new window, you’ll be prompted to add a Client Name and Description. Name the API client
Zip App. You can leave the Description blank.
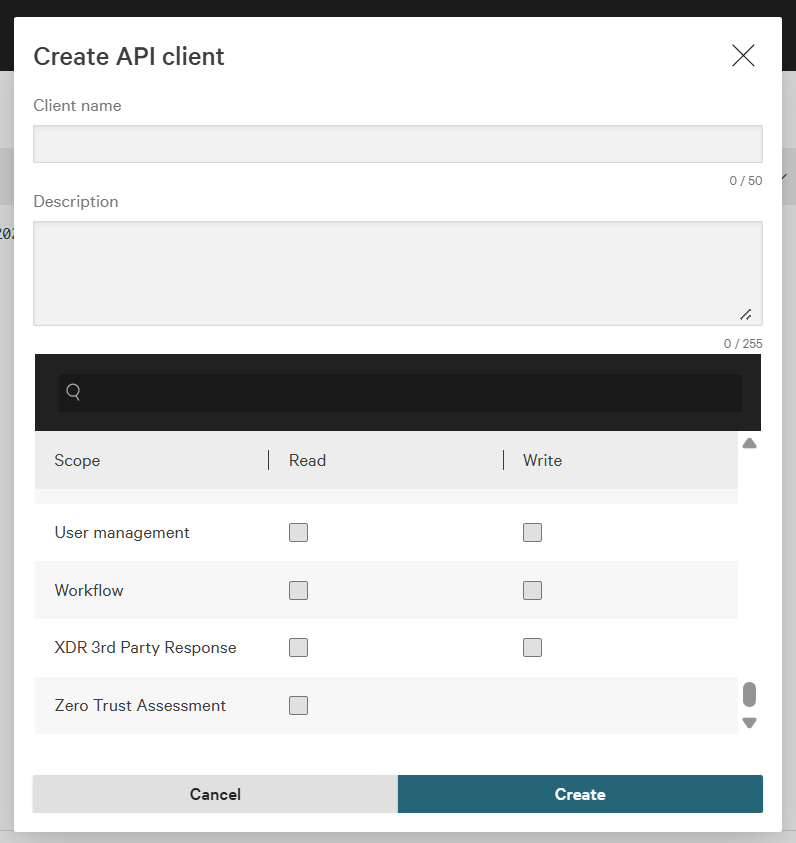
- You will also be asked to select which set of permissions to give the API client. Zip will need the following in order to provide you our full feature set. Please select the required scopes from the list below (presented in the order they appear in the Crowdstrike interface).
Scope | Read | Write |
Alerts | ✅ | ✅ |
Detections | ✅ | ✅ |
Device control policies* | ✅ | ✅ |
Hosts | ✅ | ✅ |
Assets* | ✅ | |
Host groups | ✅ | ✅ |
Incidents | ✅ | ✅ |
Installation Tokens | ✅ | |
IOC Management | ✅ | |
IOCs (Indicators of Compromise) | ✅ | |
Prevention Policies | ✅ | ✅ |
Quarantined Files | ✅ | |
Sensor Download | ✅ | |
Sensor Update Policies | ✅ | ✅ |
User Management | ✅ |
*These scopes may not immediately be available. Please inform your Zip onboarding partner if you are not able to select these options during setup.
- Click the
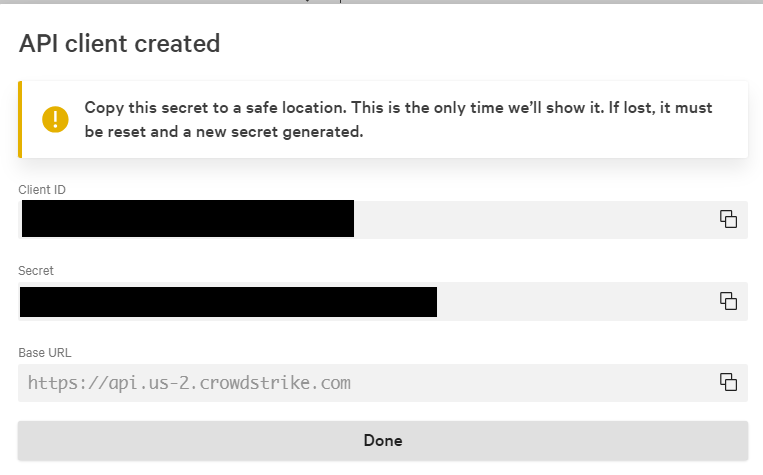
Createbutton. A new screen will pop up with a Client ID and Client Secret. Before you clickDone, record the information in a secure Password manager, like 1Password. You will not be able to access the Secret after clickingDoneand you will use these credentials in the following steps.
Click Save.
- Login to your Zip console. From the homepage, click the blue
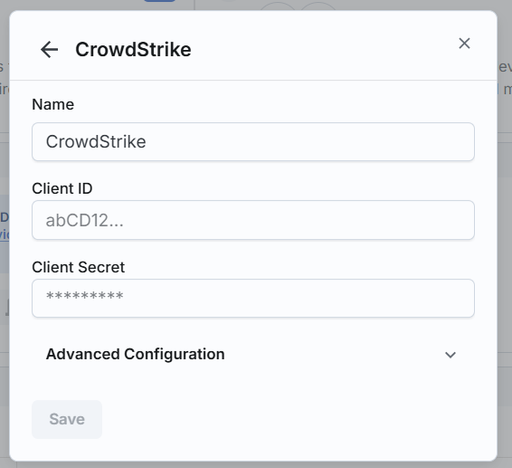
+button in the Endpoint Detection and Response box to add the Crowdstrike integration to Zip. Name the connectionCrowdstrikeand paste in the Client ID and Client Secret that you saved in the previous step. - Expand the “Advanced Configuration” toggle at the bottom of the form
- Change the CrowdStrike API URL field to your CrowdStrike tenant’s base API URL. It should be one of the following:
- US-1:
https://api.crowdstrike.com - US-2:
https://api.us-2.crowdstrike.com - EU-1:
https://api.eu-1.crowdstrike.com - US-GOV-1:
https://api.laggar.gcw.crowdstrike.com - US-GOV-2:
https://api.us-gov-2.crowdstrike.mil

For organizations connecting to a CrowdStrike tenant in a different region other than
https://api.us-2.crowdstrike.comOtherwise, leave these fields as the default values.
- Click
Saveand you’re done! Zip will connect to your Crowdstrike and run a series of health checks.
Questions? Here’s how to reach us:
- Email: success@zipsec.com